In this article, we’ll guide you through the process of uploading large files to AWS S3 using Laravel. Whether you are working with massive video files, large datasets, or other significant data, we have outlined simple steps for you to easily manage file uploads. By the end of this tutorial, you'll know how to transfer files to AWS S3 quickly and efficiently, optimizing your project for speed and reliability.
We'll also discuss AWS S3 bucket settings, configuring AWS S3 with Laravel, and integrating the AWS SDK into your Laravel Blade template. Follow this step-by-step guide to get your files uploading to S3 with ease
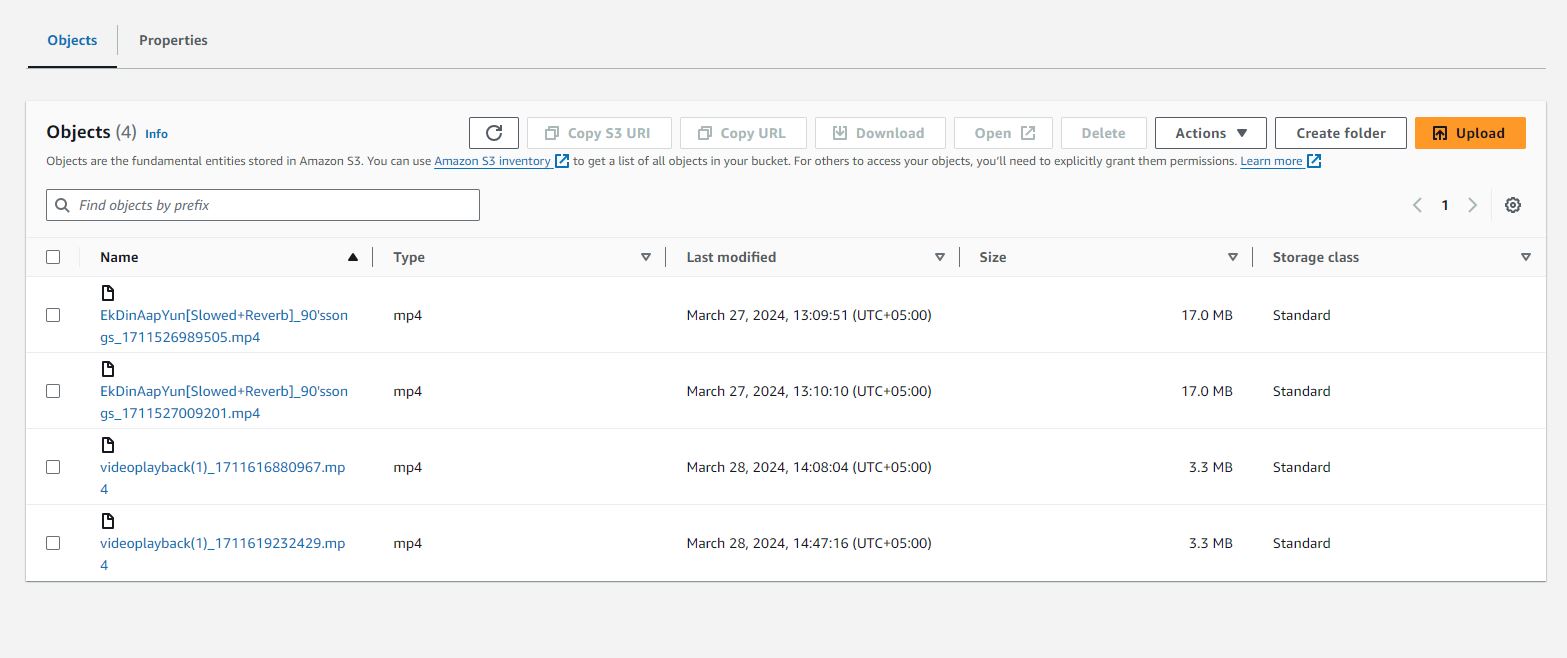
Step 1: Configure AWS S3 Bucket
Before you upload files to AWS, you need to create an S3 bucket and configure the necessary settings.
Bucket Name: Provide a unique name for your bucket. Ensure the name is globally unique across all AWS accounts.
Region: Select the AWS region where you want to host your bucket. It’s advisable to choose a region close to your target audience for faster upload speeds.
Access Control List (ACL): Define the permissions for accessing the bucket. You can set public or private access based on your project’s needs.
Enable CORS (Cross-Origin Resource Sharing): If your application needs to make cross-origin requests to the S3 bucket (e.g., from your frontend to the backend), configure the CORS settings accordingly. This is crucial for applications that require direct file uploads from the client side.
Optional Settings: Customize additional settings like versioning, server access logging, and encryption based on your security and logging requirements.
Step 2: Configure AWS Credentials in Laravel
To integrate AWS with Laravel, first, you need to configure your AWS credentials. Open your .env file and add the following credentials:
AWS_ACCESS_KEY_ID=AKxxxxxxxxxxxxxxxxxML
AWS_SECRET_ACCESS_KEY=dY9CxxxxxxxxxxxxxxxxxxxxxxxxxxxxxebvjV
AWS_DEFAULT_REGION=us-east-1
AWS_BUCKET=249show
AWS_USE_PATH_STYLE_ENDPOINT=false
AWS_URL=
AWS_BUCKET_URL="https://249show.s3.us-east-1.amazonaws.com/" # Bucket URL (optional)
AWS_ENDPOINT=s3.us-east-1.amazonaws.com
These credentials will connect your Laravel application to your AWS S3 bucket. Ensure that your AWS_ACCESS_KEY_ID and AWS_SECRET_ACCESS_KEY are kept secure.
Additionally, you will need to set the default file system to S3 by updating your .env file:
FILESYSTEM_DISK=s3
If you want to use S3 as the default storage system for all files in your application, this setting will enable it. Otherwise, you can specify when and where to use S3 in your app.
Step 3: Update Filesystems Configuration
To fully integrate AWS S3 into your Laravel app, open the config/filesystems.php file and ensure the following configuration is set for the default filesystem:
Navigate to config/filesystems.php
'default' => env('FILESYSTEM_DISK', 's3'),
This configuration ensures that your Laravel application uses the S3 disk for storing files by default.
Step 4: Integrate AWS Logic into Blade Template
Now, let’s integrate the AWS SDK into a Laravel Blade template to upload files to S3. Below is an example template for uploading a video file.
<!DOCTYPE html>
<html lang="en">
<head>
<meta charset="utf-8">
<meta name="viewport" content="width=device-width, initial-scale=1">
<title>Upload AWS - Elegant Laravel</title>
{{-- Bootstrap js --}}
<link href="https://cdn.jsdelivr.net/npm/bootstrap@5.3.0/dist/css/bootstrap.min.css" rel="stylesheet"
integrity="sha384-9ndCyUaIbzAi2FUVXJi0CjmCapSmO7SnpJef0486qhLnuZ2cdeRhO02iuK6FUUVM" crossorigin="anonymous">
{{-- AWS CDN (Required) --}}
<script src="https://sdk.amazonaws.com/js/aws-sdk-2.283.1.min.js"></script>
</head>
<body>
<div class="container-fluid row d-flex align-items-center justify-content-center mt-4">
<div class="col-md-6">
<div class="card">
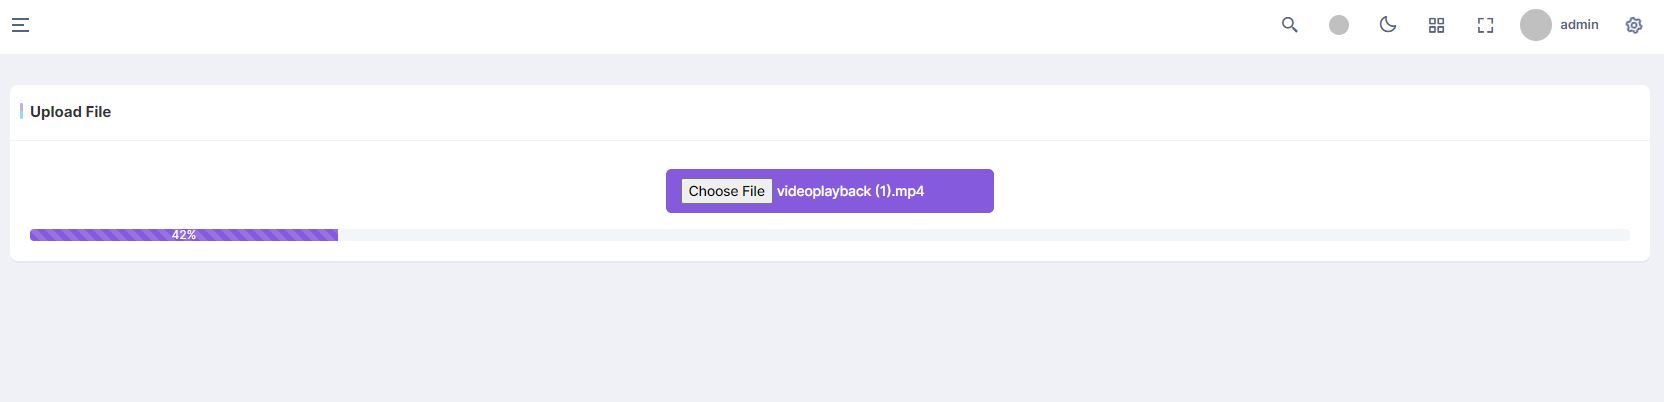
<div class="card-header">Upload Video to AWS S3 - Elegant Laravel</div>
<div class="video_upload p-3 my-3" id="video_upload">
<div id="upload-container" class="text-center">
<input type="file" id="browseFile" class="btn btn-primary"></input>
</div>
<div style="display: none" class="progress mt-3" style="height: 25px">
<div class="progress-bar progress-bar-striped progress-bar-animated" role="progressbar"
aria-valuenow="75" aria-valuemin="0" aria-valuemax="100" style="width: 75%; height: 100%">
75%</div>
</div>
</div>
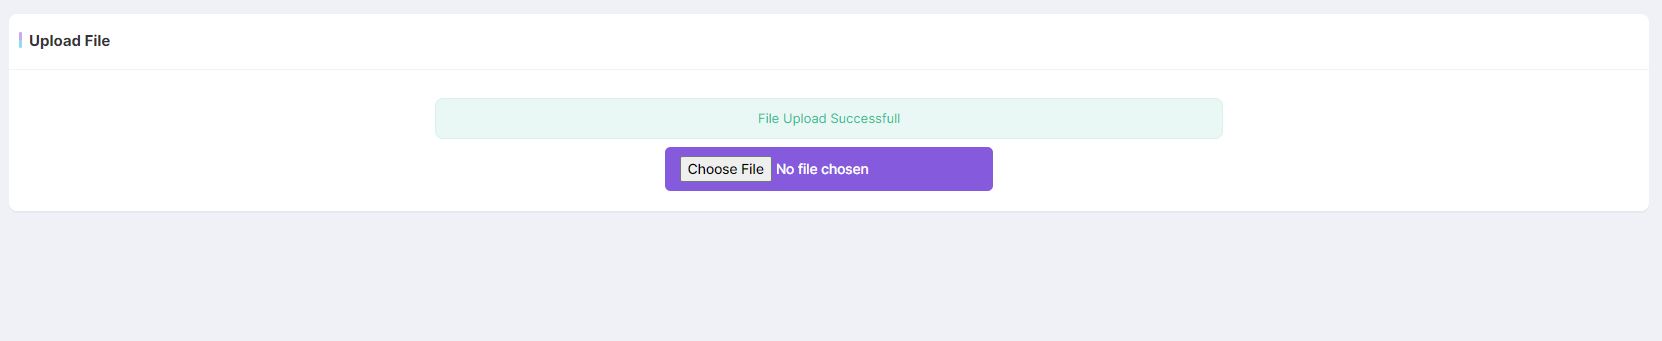
<div class="d-none text-center" id="final_success">
<h2 class="text-success">File Upload Successful</h2>
</div>
</div>
</div>
</div>
<script>
$(document).ready(function() {
$("#browseFile").on('change', function() {
var files = document.getElementById('browseFile').files;
if (files) {
if (!files.length) {
alert('Please choose a file to upload first.');
}
var f = files[0];
var fileName = f.name.replace(/\s/g, '');
var fileExtension = fileName.split('.').pop();
var fileName = fileName.replace('.' + fileExtension + '.' + fileExtension);
console.log(fileName);
var timestamp = new Date().getTime(); // Get current timestamp in milliseconds
fileName = fileName.replace('.' + fileExtension, '') + '_' + timestamp + '.' + fileExtension;
const s3 = new AWS.S3({
correctClockSkew: true,
endpoint: '{{ env('AWS_ENDPOINT') }}',
accessKeyId: '{{ env('AWS_ACCESS_KEY_ID') }}',
secretAccessKey: '{{ env('AWS_SECRET_ACCESS_KEY') }}',
region: '{{ env('AWS_DEFAULT_REGION') }}',
logger: console
});
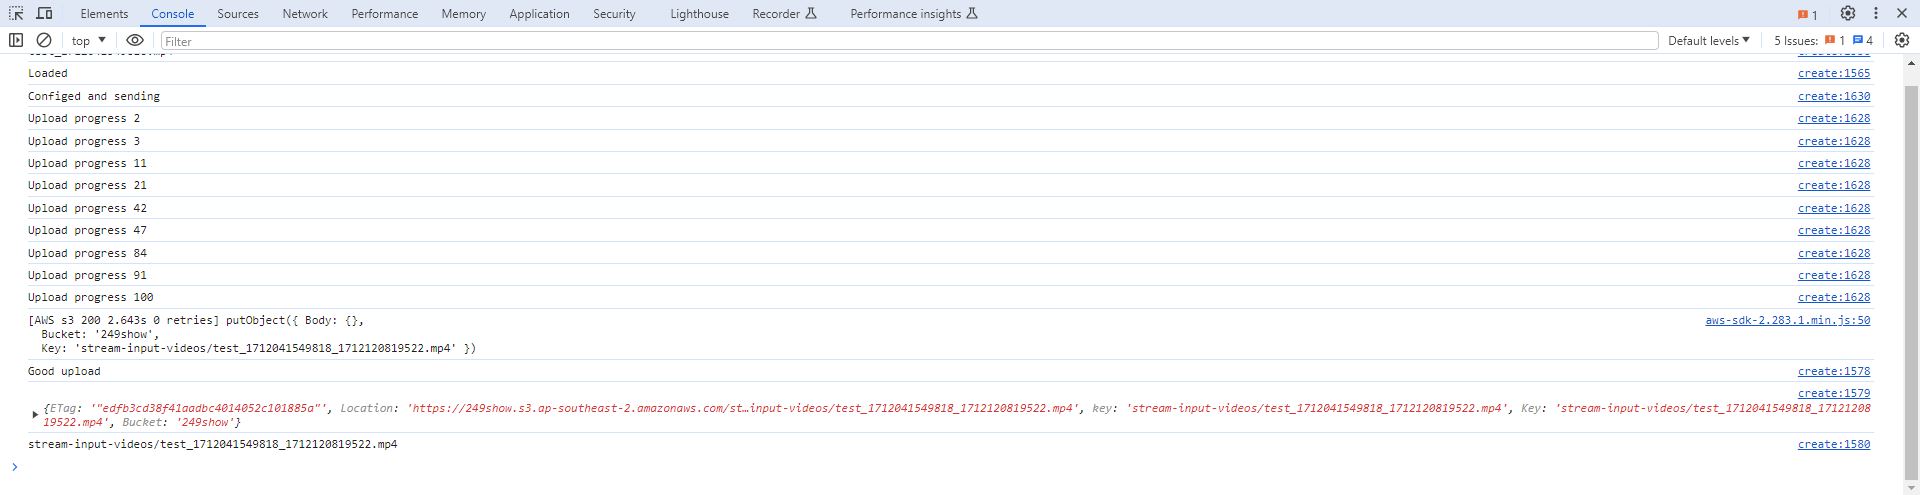
console.log('Loaded');
const uploadParams = {
Bucket: '249show',
Key: 'files/stream-videos/' + fileName,
Body: f
};
const uploadRequest = s3.upload(uploadParams);
uploadRequest.send(function(err, data) {
if (err) {
console.log('UPLOAD ERROR: ' + JSON.stringify(err, null, 2));
} else {
console.log('Good upload');
$('#final_success').removeClass('d-none').show();
setTimeout(function() {
$('#final_success').hide();
}, 5000);
hideProgress();
$('input[id=browseFile').val('');
}
});
uploadRequest.on('httpUploadProgress', function(event) {
if (progressshow === false) {
showProgress();
}
const progressPercentage = Math.floor(event.loaded * 100 / event.total);
if (progressshow === true) {
updateProgress(progressPercentage);
}
console.log('Upload progress ' + progressPercentage);
});
console.log('Configured and sending');
let progress = $('.progress');
let progressshow = false;
function showProgress() {
progressshow = true;
progress.find('.progress-bar').css('width', '0%');
progress.find('.progress-bar').html('0%');
progress.find('.progress-bar').removeClass('bg-success');
progress.show();
}
function updateProgress(value) {
progress.find('.progress-bar').css('width', `${value}%` );
progress.find('.progress-bar').html(`${value}%` );
}
function hideProgress() {
progressshow = false;
progress.hide();
}
}
});
});
</script>
{{-- Jquery --}}
<script src="https://code.jquery.com/jquery-3.7.0.min.js"></script>
</body>
</html>
Uploading large files to AWS S3 using Laravel is an essential task for applications dealing with extensive data like videos or high-resolution images. By following this guide, you've learned how to configure your S3 bucket, integrate AWS credentials into Laravel, and set up a Blade template for seamless file uploads.